Section 2: Locking in Contract Records in DMS
Anchor: #i1002106Overview
Each contract will be imported into the DMS system via an automated process. It is the responsibility of the District to review that the contract details have been entered correctly. The contract settings should not be changed unless CIV staff is consulted.
Anchor: #i1002116To View All New Records
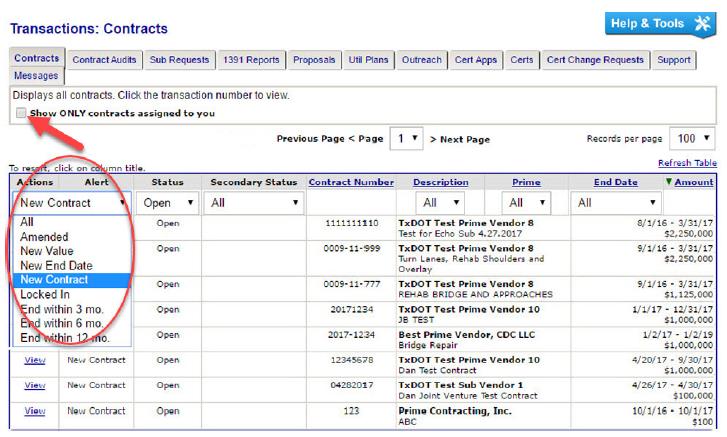
Step 1: From the View Menu, click Contracts.
Step 2: From the Actions list, select New Contract.
Anchor: #i1002135Locking In New Contract Records
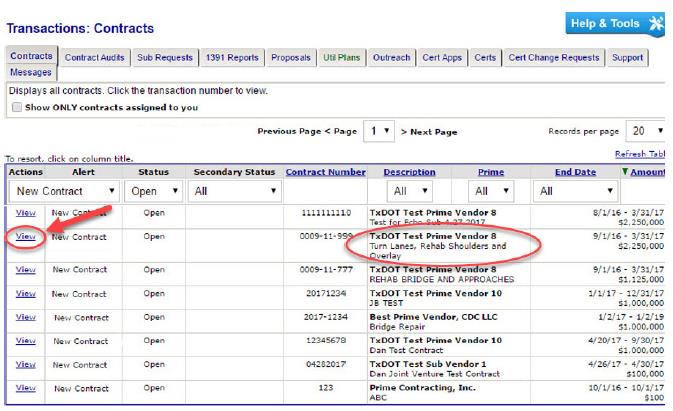
Step 1: Click View to view the associated contract record.
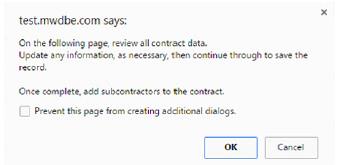
Step 2: Click Review Contract. (An alert displays to provide instructional information.)
Note: All contract alerts are displayed in red. If the contract is a new record, the alert “Contract record is new and must be reviewed for accuracy” will be listed.
Step 3: Click OK (The contract edit page displays with the contract header data from the import auto-filled into the fields. Many fields will be blank or zero.)
Step 4: Review the entire record and update as needed. When finished, click Review at the bottom of the page. When reviewing the data, do the following:
- Anchor: #AGLQDJTS
- Verify Contract title/description Anchor: #i1000387
- Verify CSJ Anchor: #i1000393
- Verify Value of contract Anchor: #i1000399
- Verify (and change if necessary) (Projected) End Date Anchor: #i1000405
- Verify Prime Contractor Information Anchor: #i1000411
- Verify (and change if necessary) Buyer/Project Manager (in-system user) Anchor: #i1000417
- Verify DBE Goal Anchor: #i1000423
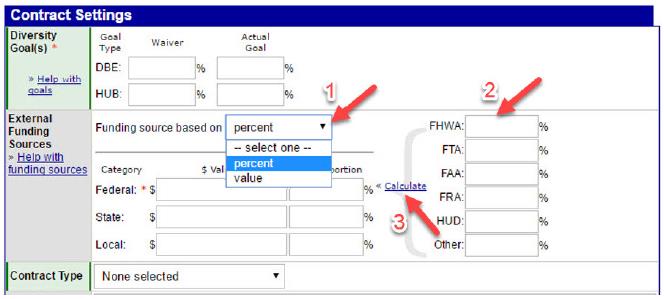
- Add funding sources and amount (important for DBE FHWA funded projects)
CIV will post the Federal Contract Update Report in SharePoint, which will include the project CSJ and corresponding percentage of federal funding. Use the information to complete the following:
- Anchor: #UNGRFFSC
- Select Percentage from the Funding source based on dropdown menu. Anchor: #FTWLTNPY
- Enter the percentage amount from the Federal Contract Update Report in the FHWA field. Anchor: #EULXAGBK
- Click the Calculate link.
- Anchor: #TFJKEMVH
- Verify subcontractor settings
NOTE: Do not adjust default settings.
- Anchor: #AHGKGOVW
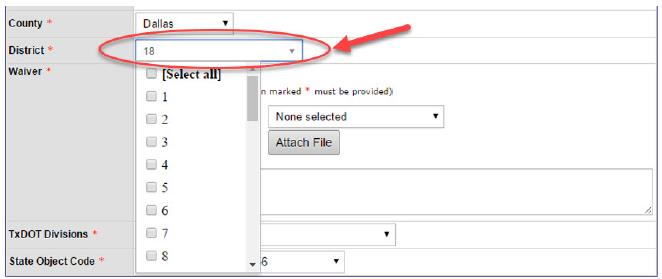
- Select the appropriate County. Anchor: #i1000441
- Select the Congressional District of the State of Texas number where the project resides. (Multiple selections are allowed if the project encompasses multiple Districts) Anchor: #i1000447
- Verify Waiver information Anchor: #i1000453
- Select the appropriate TxDOT Division. Anchor: #i1000459
- Select the appropriate State Object Code. Anchor: #i1000465
- Adjust audit settings (as necessary for DBE prime contractors) Anchor: #i1000471
- Verify Contract compliance officer is correctly assigned. Anchor: #i1000477
- Add notes (if necessary) Anchor: #i1000483
- Attach electronic documentation
Step 5: Click Review to review the contract. (Click Edit to make further changes, if needed)
Step 6: To save the record, click Save.
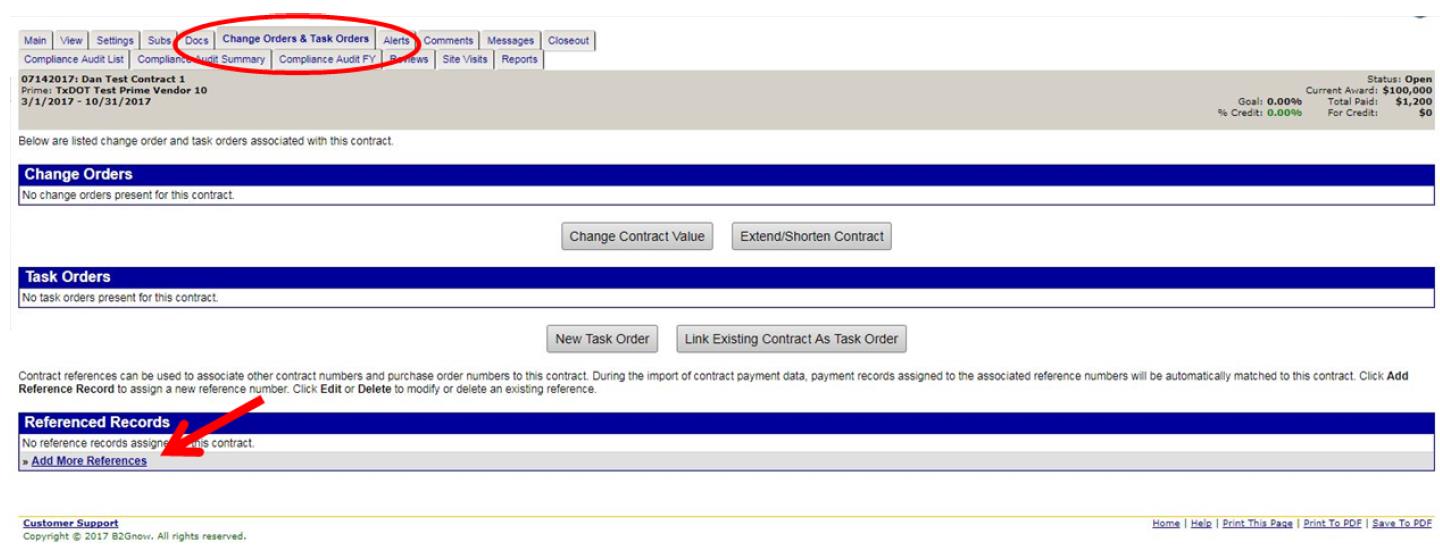
Step 7: Select the Change Orders & Task Orders tab. Click Add More References.
Step 8: Enter the CSJ and select Contract Number. Click Save References.
