Section 7: Dowel Bar Retrofit
Anchor: #i10111757.1 Introduction
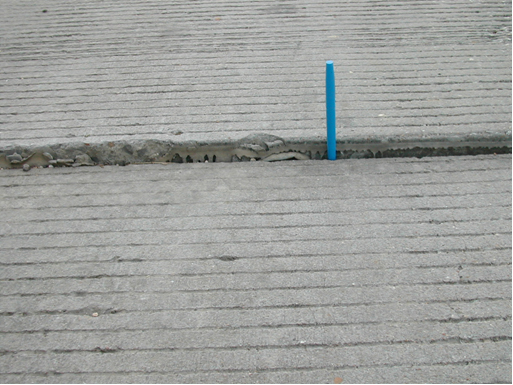
This rehabilitation technique is only applicable to CPCD, not CRCP. Load transfer is defined as the ability of a joint or crack to transfer wheel load from one slab to the next. Good load transfer at the joints improves the performance of CPCD, and the majority of load transfer is achieved by dowels which cross the transverse joints. Aggregate interlock is supposed to provide some load transfer; however, the effectiveness of aggregate interlock diminishes with time as concrete contracts due to drying shrinkage. Also, the contribution of aggregate interlock to the load transfer is substantially diminished during winter when the temperature is low and joint opening becomes large. To ensure adequate load transfer for the life of the pavement, dowels must be used. However, there are jointed concrete pavement sections that were built without dowels. The absence of dowels along with deficient base or subgrade support results in faulting and cracking problems at joints. Figure 10-17 shows faulting in CPCD.
Figure 10-17. Severe faulting at the transverse joint.
The pavement shown in Figure 10-17 does not have dowel bars, and the base support was not adequate. The lack of load transfer in CPCD sections without dowels increases the dynamic wheel loading, which results in increased faulting. One of the most efficient ways to restore load transfer at the joints is dowel bar retrofit (DBR). In DBR, slots are cut, concrete removed, dowel bars inserted, repair mortar is placed in the slots, the surface finished, cured, and, most often, diamond ground. Many states have used DBR to restore old CPCD where dowels were not used and have had success. The department has developed a special specification and design standards for DBR.
Anchor: #i10057767.2 DBR Procedures
The following describes the steps needed to complete the DBR:
- Anchor: #YUHPHIWB
- Identify the need for DBR. Anchor: #TVIGDKWH
- Cut the slots. Anchor: #XTMEEFWC
- Prepare the slots. Anchor: #HGNKMSII
- Place dowels. Anchor: #FFDGFHLL
- Place repair mortar in the slots.
1. Identify the need for DBR
Any of the following conditions warrant the use of DBR:
- Anchor: #DHTKKKIF
- load transfer efficiency (LTE) of 60% or less, Anchor: #VXIOLXHV
- faulting greater than 0.1 in., or Anchor: #EFNWUOFS
- differential deflection of 10 mils or more.
If the faulting is due to deficient base support, DBR alone should not be used to restore LTE. In this case, base repair should be done in addition to DBR.
For pavements where the pavement condition is satisfactory but dowels were not used, DBR can be used to strengthen the pavement’s structural condition as a preventive maintenance operation.
2. Cut the slots
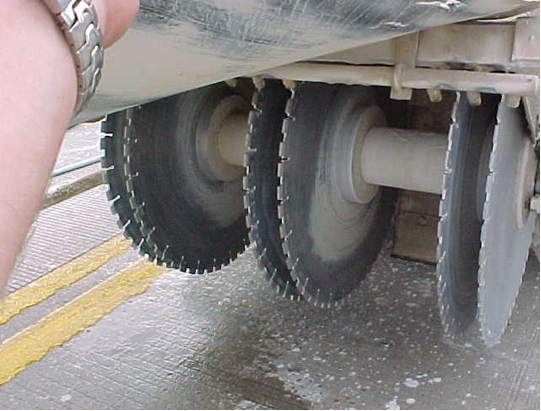
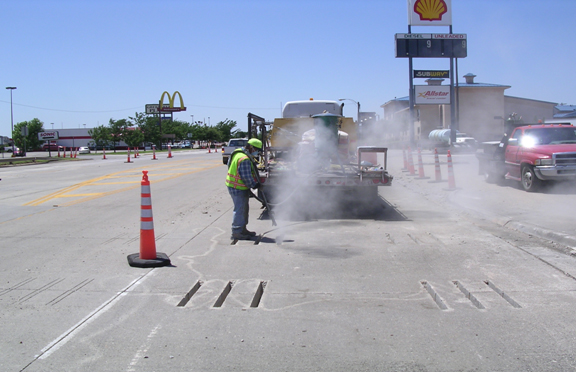
Once the need for DBR is established, the next step is to cut the slots using a diamond saw slot cutter. It is customary to provide three dowel bars in each wheel path. The diamond saw slot cutter shown in Figure 10-18 cuts multiple slots in a single pass. These cuts form the edges of the slots. When cutting slots, it is important that the slots are aligned parallel to centerlines. The slots need to be sufficiently wide to permit the largest aggregates in the repair material to flow around the bars and consolidate properly.
Figure 10-18. Diamond saw slot cutter.
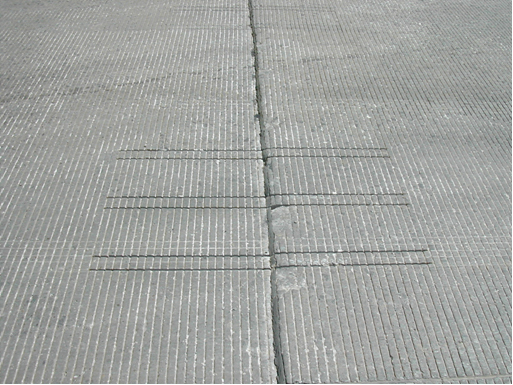
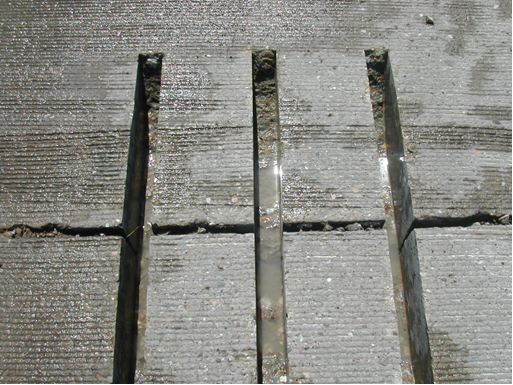
Figure 10-19 shows the cuts made for slots. Slots are usually 12 in. apart, center-to-center. Note that the cuts are clean and no spalling is observed on the edges of the slots.
Figure 10-19. Cuts made for slots.
3. Prepare the slots
Slot preparation consists of:
- Anchor: #VRNBVNXO
- removing the concrete fins, Anchor: #QVSWWGGD
- flattening the bottom, Anchor: #AKDVERBA
- cleaning the slots, and Anchor: #VSLNFFRV
- caulking the joint.
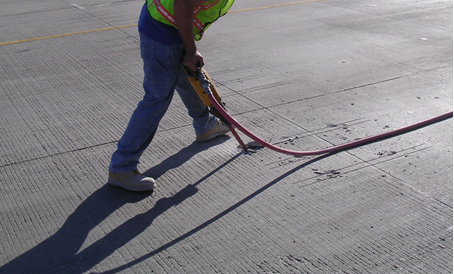
Small handheld jackhammers are used to remove the fins as shown in Figure 10-20. Once the fins are removed, the bottom of the slots is flattened using a small brush hammerhead. The flat slot bottom allows the dowels to sit level and be properly aligned. Normally, the slots are cleaned with sand blasting first as shown in Figure 10-21. Figure 10-22 shows the flat bottom after being water cleaned. Maintaining clean slots is important since the bond between repair material and slots is critical to providing good load transfer. Joint caulking is necessary to prevent patch material from entering the joint.
Figure 10-20. Removing concrete fins.
Figure 10-21. Sandblasting the slots.
Figure 10-22. Flat bottom after being water cleaned.
4. Place dowels
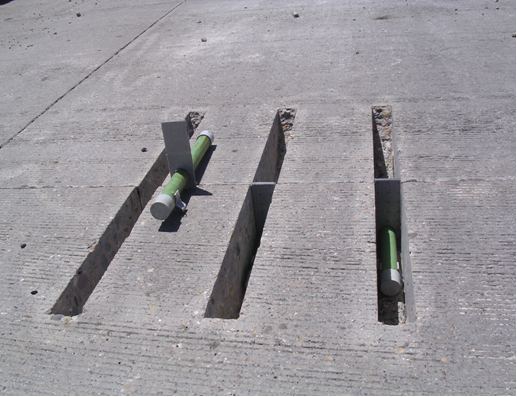
Dowels used for DBR are similar to the ones used for new CPCD. Dowels are lubricated with some type of bond breaker. Figure 10-23 shows the dowel bar assembly used for DBR with a joint reformer, endcaps, and chairs. Joint reformer and endcaps allow movement for the slab to expand into without bearing on the patch or bar. Chairs are used to support dowels in the base of the slots and allow repair mortar to surround the dowels, and should fit snugly in the slot to keep dowels properly aligned.
Figure 10-23. Dowel bar in place for backfill material application.
5. Placing repair mortar in the slots
Once the dowels are placed, the repair mortar is applied. The repair mortar should have thermal properties similar to the concrete, provide strong bond to the existing concrete, be fast setting, have little shrinkage, and develop enough strength to allow traffic in a short time. Both high-early-strength concrete and prepackaged mixes have been used successfully. High-early-strength concrete usually contains Type III cement and accelerators. Accelerators decrease set times and increase rate of strength development. Aggregates in the mix should be small enough to allow the concrete to flow around the bar and consolidate properly. Consolidation of the repair mortars is done with a small spud vibrator. Care should be taken not to hit the dowels with the vibrator, knocking the dowel out of alignment.
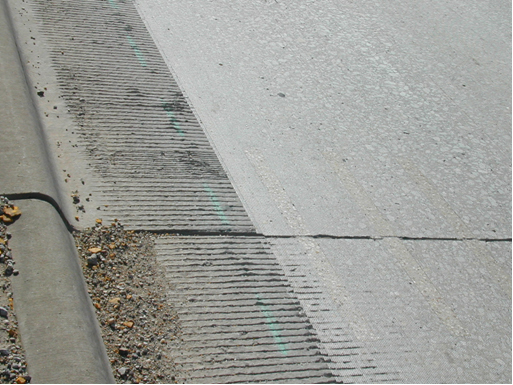
Once the repair mortar is applied, the surface is finished flush with the surrounding surface. Curing compound should be applied as soon as practical. Prepackaged repair materials should be cured according to the manufacturer’s recommendations. Sawing is done over the joint reformer, and the entire project is diamond ground, with resealing the joints as a final step. Figure 10-24 shows the section shown in Figure 10-17 after DBR, slab jacking, and diamond grinding (DG). Refer to Section 9 about the details of diamond grinding.
Figure 10-24. After DBR, slab jacking, and diamond grinding of the section shown in Figure 10-17.
