Section 3: TPP Feature Input Instructions
Anchor: #i1085883About This Section
The features listed in this section include definitions, descriptions, and input instructions of features for which TPP is solely responsible.
Anchor: #i1085893Boundaries
Boundaries are controlling entities, such as districts, counties, or cities, that act as limiters for road segments:
Figure 11-5. Measure boundaries at centerline.
Boundary Begin/End (Roadway Feature value 35) identifies the beginning or ending point of boundaries on a roadway segment: B (beginning of the boundary) or E (ending of the boundary).
Boundary Type values identify the type of controlling entity responsible for a given route segment:
|
Value |
Type |
|---|---|
|
A |
State |
|
B |
|
|
C |
County |
|
D |
City |
|
E |
Urban ( FIPS Urban Area Number) |
|
F |
State Park |
|
G |
State Forest |
|
H |
Other State Reservations |
|
I |
Other State Agencies |
|
J |
Other Federal Agencies |
|
K |
Bureau of Indian Affairs |
|
L |
US Forest Service |
|
M |
National Park Service |
|
O |
Military Reservation/Corps of Engineers |
|
blank |
No Boundary |
Boundary Values is a Length data attribute associated with a given Boundary Type; input for Boundary Types B thru E:
|
If Boundary Type is: |
Then Boundary value is the: |
|---|---|
|
B |
District Id number |
|
C |
County Number |
|
D |
City Number |
|
E |
FIPS Urban Area Number |
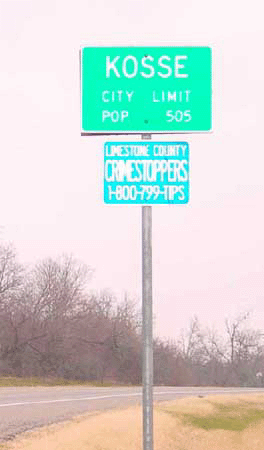
Figure 11-6. City limit.
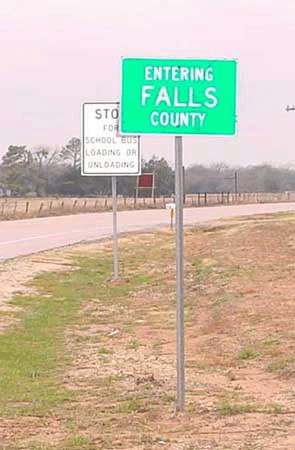
Figure 11-7. County line.
Follow these input instructions to add boundaries:
|
Step |
Action |
Input |
|---|---|---|
|
1 |
(For instructions to log onto the system, click this link) From the TPP Database Maintenance Menu, select Update-Code 22H and press <E>; the Point Data screen appears |
Do not overlap boundary points of the same type, i.e. district boundaries crossing into other districts |
|
2 |
Input Location Key fields |
NOTE: Input the begin and end points separately; a given highway may not be contained within an entire controlling entity
|
|
3 |
Input Feature Data fields and press <F2>; the system updates TRM with the new boundary data and displays the message “Transaction completed successfully” |
|
|
4 |
To input other add feature transactions, press <F9> to clean the screen (optional) and repeat the first step To input another Update-Code, press <F3> to exit back to the TPP Database Maintenance Menu To exit back to the TRM Main Menu, press <F10> (For instructions to log off the system, click this link) |
- |
Follow these input instructions to delete boundaries:
|
Step |
Action |
Input |
|---|---|---|
|
1 |
(For instructions to log onto the system, click this link) From the TPP Database Maintenance Menu, select Update-Code 21H and press <E>; the Point Data screen appears |
- |
|
2 |
Input Location Key fields |
|
|
3 |
Input Feature Data fields and press <F2>; the system retrieves record data from TRM. A prompting message “Press PF2 to confirm or PF 11 to cancel” appears |
|
|
4 |
Repress <F2> to confirm deletion; the system displays the verification message “Transaction completed successfully” and deletes all data records associated with the deleted boundaries |
OR Press <F11> to cancel deletion; the system takes no action |
|
5 |
To input another Update-Code, press <F3> to exit back to the TPP Database Maintenance Menu To exit back to the TRM Main Menu, press <F10> (For instructions to log off the system, click this link) |
- |
Follow these input instructions to update boundary location:
|
Step |
Action |
Input |
|---|---|---|
|
1 |
(For instructions to log onto the system, click this link) From the TPP Database Maintenance Menu, select Update-Code 23H and press <E>; the Update Selection Menu appears |
Do not overlap boundary points of the same type, i.e. district boundaries crossing into other districts |
|
2 |
Input an X by Update Attribute Location and press <E>; the Point Data screen appears and a prompt message requests the updated feature’s location plus any other required fields the system needs to locate the feature record |
- |
|
3 |
Input Location Key fields and press <E>; the system retrieves record data from TRM. A prompting message “Enter new Reference-Marker location” appears |
|
|
4 |
Input update fields and press <F2>; the system updates the location and the verification message “Transaction completed successfully” appears. The original request for the current location to update displays for another update transaction |
|
|
5 |
To select Update Attribute Elements, press <F3> to exit back to the Update Selection menu To input another Update-Code, press <F3> twice to exit back to the TPP Database Maintenance Menu To exit back to the TRM Main Menu, press <F10> (For instructions to log off the system, click this link) |
- |
Follow these input instructions to update boundary attributes:
|
Step |
Action |
Input |
|---|---|---|
|
1 |
(For instructions to log onto the system, click this link) From the TPP Database Maintenance Menu, select Update-Code 23H and press <E>; the Update Selection Menu appears |
Do not overlap boundary points of the same type, i.e. district boundaries crossing into other districts |
|
2 |
Input an X by Update Attribute Elements and press <E>; a prompt message requests the updated attribute’s location plus any other required fields the system needs to locate the feature record |
- |
|
3 |
Input Location Key fields |
|
|
4 |
Input Feature Data fields and press <E>; the system retrieves record data from TRM. A prompting message “Enter Updated Attribute Data” appears |
|
|
5 |
Input update fields and press <F2>; the system updates the feature’s data attributes and the verification message “Transaction completed successfully” appears. The original request for the current attributes to update displays for another update transaction |
|
|
6 |
To select Update Attribute Location, press <F3> to exit back to the Update Selection menu To input another Update-Code, press <F3> twice to exit back to the TPP Database Maintenance Menu To exit back to the TRM Main Menu, press <F10> (For instructions to log off the system, click this link) |
- |
Anchor: #i1085963
Railroad Crossings
Railroad Crossings are locations on the roadway at which train tracks cross the roadway either at grade (see Figure 11-9), above the roadway, or below the roadway.
Railroad Number is a unique identification number assigned to each individual at-grade railroad crossing by either the owning railroad or by TPP:
Figure 11-8. Measure crossing at centerline.
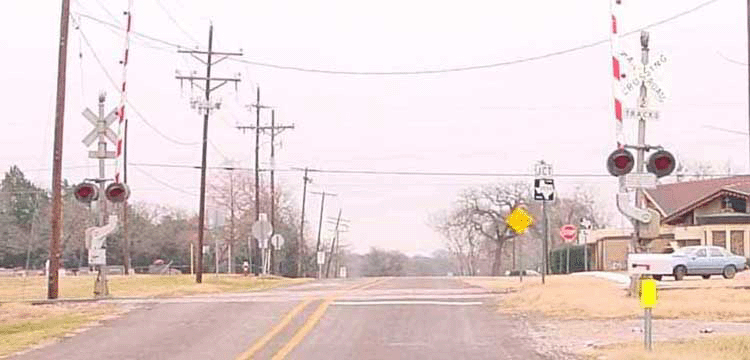
Figure 11-9. At-grade railroad crossing.
Follow these input instructions to add railroad crossings:
|
Input |
Step |
Action |
|---|---|---|
|
1 |
(For instructions to log onto the system, click this link) From the TPP Database Maintenance Menu, select Update-Code 22H and press <E>; the Point Data screen appears |
- |
|
2 |
Input Location Key fields |
|
|
3 |
Input Feature Data fields and press <F2>; the system updates TRM with the new railroad crossing data and displays the message “Transaction completed successfully” |
|
|
4 |
To input other add feature transactions, press <F9> to clean the screen (optional) and repeat the first step To input another Update-Code, press <F3> to exit back to the TPP Database Maintenance Menu To exit back to the TRM Main Menu, press <F10> (For instructions to log off the system, click this link) |
- |
Follow these input instructions to delete railroad crossings:
|
Step |
Action |
Input |
|---|---|---|
|
1 |
(For instructions to log onto the system, click this link) From the TPP Database Maintenance Menu, select Update-Code 21H and press <E>; the Point Data screen displays |
- |
|
2 |
Enter Location Key fields |
|
|
3 |
Enter Feature Data fields and press <F2>; the system retrieves record data from TRM. A prompting message “Press PF2 to confirm or PF 11 to cancel” appears |
|
|
4 |
Repress <F2> to confirm deletion; the system displays the verification message “Transaction completed successfully” and deletes all data records associated with the deleted railroad crossings |
OR Press <F11> to cancel deletion; the system takes no action |
|
5 |
To enter another Update-Code, press <F3> to exit back to the TPP Database Maintenance Menu To exit back to the TRM Main Menu, press <F10> (For instructions to log off the system, click this link) |
- |
Follow these input instructions to update railroad crossings location:
|
Step |
Action |
Input |
|---|---|---|
|
1 |
(For instructions to log onto the system, click this link) From the TPP Database Maintenance Menu, select Update-Code 23H; the Update Selection Menu displays |
- |
|
2 |
Input an X by Update Attribute Location and press <E>; the Point Data screen appears and a prompt message requests the updated feature’s location plus any other required fields the system needs to locate the feature record |
- |
|
3 |
Input Location Key fields and press <E>; the system retrieves record data from TRM. A prompting message “Enter new Reference-Marker location” appears |
|
|
4 |
Input update fields and press <F2>; the system updates the location and the verification message “Transaction completed successfully” appears. The original request for the current location to update displays for another update transaction |
|
|
5 |
To select Update Attribute Elements, press <F3> to exit back to the Update Selection menu To input another Update-Code, press <F3> twice to exit back to the TPP Database Maintenance Menu To exit back to the TRM Main Menu, press <F10> (For instructions to log off the system, click this link) |
- |
Follow these input instructions to update railroad crossings attributes:
|
Step |
Action |
Input |
|---|---|---|
|
1 |
(For instructions to log onto the system, click this link) From the TPP Database Maintenance Menu, select Update-Code 23H and press <E>; the Update Selection Menu appears |
- |
|
2 |
Input an X by Update Attribute Elements and press <E>; a prompt message requests the updated attribute’s location plus any other required fields the system needs to locate the feature record |
- |
|
3 |
Input Location Key fields |
|
|
4 |
Input Feature Data fields and press E>; the system retrieves record data from TRM. A prompting message “Enter Updated Attribute Data” appears |
|
|
5 |
Input update fields and press <F2>; the system updates the feature’s data attributes and the verification message “Transaction completed successfully” appears. The original request for the current attributes to update displays for another update transaction |
|
|
6 |
To select Update Attribute Location, press <F3> to exit back to the Update Selection menu To input another Update-Code, press <F3> twice to exit back to the TPP Database Maintenance Menu To exit back to the TRM Main Menu, press <F10> (For instructions to log off the system, click this link) |
- |
Anchor: #i1086016
Structures
Structures are bridges or other elevated roadway segments required to cross a depression or obstacle; combination of culverts equaling twenty feet wide or more (bridge-class culvert). The Roadway Records office adds, updates, or deletes structure data. District offices may update attributes associated with the structure, but cannot update the Structure Number.
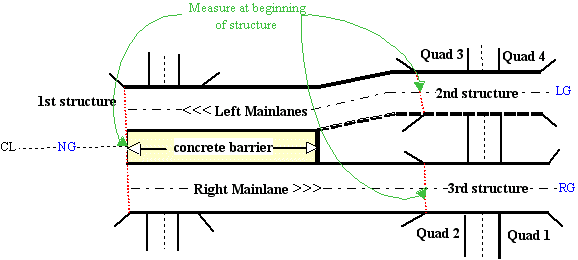
The location value for a structure is the point where the structure begins if travelling the roadway in ascending marker direction. The end point is calculated for the ARI diagram using the structure length from the BRINSAP file:
Figure 11-10. Measure at beginning of structure traveling in ascending marker order.
Figure 11-11. Fred Hartman Bridge over the ship channel.
Structure Number is the 14 digit number identifying a bridge or bridge-class culvert.
EXAMPLE: 12102351005123 (Houston District, Harris County, Control-Section 3510-05):
|
Digit places |
Input |
Values |
|---|---|---|
|
2 |
District-Id |
(1 - 25) |
|
3 |
County Number |
(001 - 254) |
|
6 |
Control-Section |
(0001-01 - 9999-99) |
|
3 |
Bridge Number |
(001 - 999) |
Follow these input instructions to add structures:
|
Step |
Action |
Input |
|---|---|---|
|
1 |
(For instructions to log onto the system, click this link) From the TPP or District Database Maintenance screen, select Update-Code 22H and press <E>; the Point Data screen appears |
- |
|
2 |
Enter Location Key fields |
|
|
3 |
Enter Feature Data fields and press <F2>; the system updates TRM with the new structure data and displays the message “Transaction completed successfully” |
|
|
4 |
To enter other add feature transactions, press <F9> to clean the screen (optional) and repeat the first step To enter another Update-Code, press <F3> to exit back to the TPP/District Database Maintenance Menu To exit back to the TRM Main Menu, press <F10> (For instructions to log off the system, click this link) |
- |
Follow these input instructions to delete structures:
|
Step |
Action |
Input |
|---|---|---|
|
1 |
(For instructions to log onto the system, click this link) From the TPP or District Database Maintenance screen, select Update-Code 21H and press <E>; the Point Data screen appears |
- |
|
2 |
Input Location Key fields |
|
|
3 |
Input Feature Data fields and press <F2>; the system retrieves record data from TRM. A prompting message “Press PF2 to confirm or PF 11 to cancel” appears |
Roadway Feature Value |
|
4 |
Repress <F2> to confirm deletion; the system displays the verification message “Transaction completed successfully” and deletes all data records associated with the deleted structures |
OR Press <F11> to cancel deletion; the system takes no action |
|
5 |
To input another Update-Code, press <F3> to exit back to the TPP/District Database Maintenance Menu To exit back to the TRM Main Menu, press <F10> (For instructions to log off the system, click this link) |
- |
Follow these input instructions to update structures location:
|
Step |
Action |
Input |
|---|---|---|
|
1 |
(For instructions to log onto the system, click this link) From the TPP or District Database Maintenance screen, select Update-Code 23H and press <E>; the Update Selection Menu appears |
- |
|
2 |
Input an X by Update Attribute Location and press <E>; a prompt message requests the updated feature’s location plus any other required fields the system needs to locate the feature record |
- |
|
3 |
Input Location Key fields and press <E>; the system retrieves record data from TRM. A prompting message “Enter new Reference-Marker location” appears |
|
|
4 |
Input update fields and press <F2>; the system updates the location and the verification message “Transaction completed successfully” appears. The original request for the current location to update displays for another update transaction |
|
|
5 |
To select Update Attribute Elements, press <F3> to exit back to the Update Selection menu To input another Update-Code, press <F3> twice to exit back to the TPP/District Database Maintenance Menu To exit back to the TRM Main Menu, press <F10> (For instructions to log off the system, click this link) |
- |
Follow these input instructions to update structures attributes:
|
Step |
Action |
Input |
|---|---|---|
|
1 |
(For instructions to log onto the system, click this link) From the TPP or District Database Maintenance screen, select Update-Code 23H and press <E>; the Update Selection Menu appears |
- |
|
2 |
Input an X by Update Attribute Elements and press <E>; a prompt message requests the updated attribute’s location plus any other required fields the system needs to locate the feature record |
- |
|
3 |
Input Location Key fields |
|
|
4 |
Input Feature Data fields and press <E>; the system retrieves record data from TRM. A prompting message “Enter Updated Attribute Data” appears |
Roadway Feature Value |
|
5 |
Input update fields and press <F2>; the system updates the feature’s data attributes and the verification message “Transaction completed successfully” appears. The original request for the current attributes to update displays for another update transaction |
|
|
6 |
To select Update Attribute Location, press <F3> to exit back to the Update Selection menu To input another Update-Code, press <F3> twice to exit back to the TPP/District Database Maintenance Menu To exit back to the TRM Main Menu, press <F10> (For instructions to log off the system, click this link) |
- |


