Chapter 3: TRM Operating Environment
Anchor: #i1018060Section 1: Key Points to Know
Anchor: #i1018066Texas Reference Marker System
The TRM System is an online database system used for updates, inquiries, and reports. This chapter details the steps to access TRM to maintain and query the database. To process and print ARI diagrams and reports, go to Chapter 4.
Anchor: #i1018089Authorized Users of the TRM System
The table below lists the main menu functions and the authorized users:
|
Main Menu Choice |
TPP |
District Offices |
Construction Division |
All Users |
|---|---|---|---|---|
|
TPP Database Maintenance |
Yes |
No |
No |
No |
|
District Maintenance |
Yes |
Yes |
No |
No |
|
Construction Division Maintenance |
Yes |
No |
Yes |
No |
|
Database Query |
Yes |
Yes |
Yes |
Yes |
|
Highway Status Control Reports |
Yes |
Yes |
Yes |
Yes |
|
Update Highway Status - Emergency Closing |
Yes |
Yes |
No |
No |
Anchor: #i1018108
Definitions
<E>—Press the enter key.
Update-Code—System-required value to distinguish among the different types of processes in TRM.
Network:
- Change Begin/End—Identifies the beginning or ending point of a change to an existing Signed Highway System or roadbed section: B (beginning point of change) or E (end point of change)
- Change Notation—Notation field used to explain changes to signed highways, roadbed-IDS, or reference markers on a given highway; 30 character text field
- Reason Value—System-generated field indicating reasons for a change to the signed highway, reference marker, or Roadbed-Id of a given route; superseded by Network Tracking Code
- Tracking Value—System-generated field indicates a network or marker add, update, or deletion from TRM
- Update Date—System-generated date to document changes made to either the Signed Highway, Reference Marker, or Roadbed-Id of a given route
- Update Time—System time documenting changes made to either the Signed Highway, Reference Marker, or Roadbed-Id of a given route:
-
Anchor: #i1012053Network Tracking Descriptions Value
Action
Value
Action
1
Add a Roadbed
19
Transfer Prtl Rte
2
Del a Roadbed
20
Add a Link-Concurrency
3
Upd a Roadbed-Updated/Deleted
21
Add a Link-On-Sys Link
4
Add a New Rte
22
Add a Link-Off-Sys Link
5
Add Cntg-Rte Beg
23
Upd Concurrency to On-Sys Link
6
Add Cntg-Rte End
24
Upd On-Sys Link to Concurrency
7
Add Cntg-Gap Beg
25
Upd Off-Sys Link
8
Add Cntg-Gap End
26
Del a Link-Concurrency/On- or Off-Sys Link
9
Add Non-Cntg-Rte Beg
27
Redes Whole Rte
10
Add Non-Cntg-Rte End
28
Redes Prtl Rte
11
Add Non-Cntg-Within a Gap
29
Redes Prtl Rte Rev
12
Add Fill Gap
30
Redes Cntg Beg
13
Add Marker
31
Redes Cntg Beg Rev
14
Del Marker-Corrected/Relocated
32
Redes Cntg End
15
Del Marker
33
Redes Cntg End Rev
16
Del Whole Rte
34
Redes Fill Gap
17
Del Prtl Rte
35
Redes Fill Gap Rev
18
Transfer Whole Rte
-
-
Logging On the Operating System
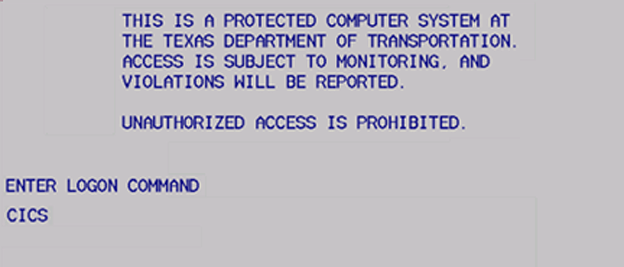
Enter TRM by logging on through the CICS mainframe facility. Double-click on the computer desktop Mainframe icon and the initial mainframe screen appears:
Figure 3-1. Initial mainframe screen.
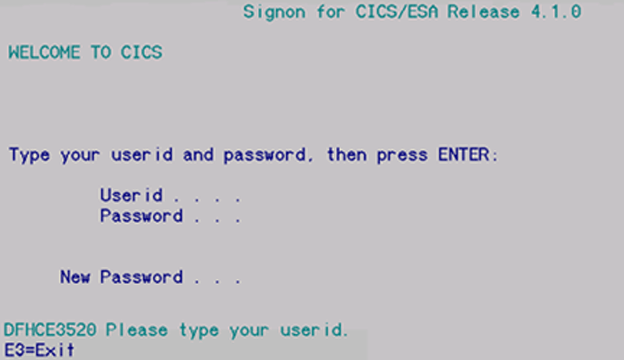
From the initial mainframe screen, input ‘CICS’ and press <E>. The CICS log on screen appears:
Figure 3-2. CICS log on screen.
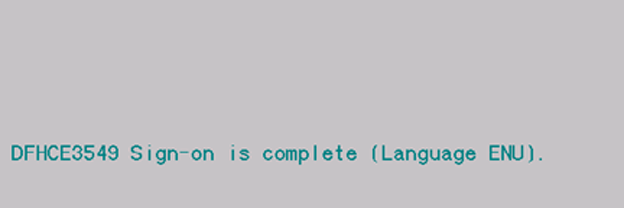
Input User Id and your top secret Password and press<E>. The Sign-on is complete screen appears:
Figure 3-3. Sign-on successful.
Input ‘NAT2’ at the cursor…
Figure 3-4. Letter case does not matter.
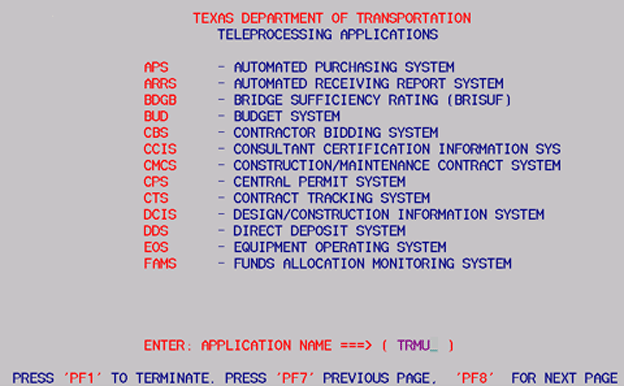
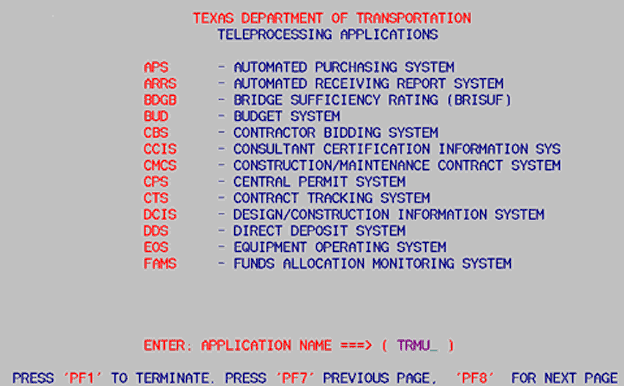
and press <E>. The Teleprocessing Applications screen appears:
Figure 3-5. The Teleprocessing Applications screen does not include an entry for TRM, but the system will accept TRMU or TRMI.
At Application Name:
- Input ‘TRMU’ to update data and press <E>.
- Input ‘TRMI’ for data inquiry and press <E>.
- Enter either one for ARI’s and reports and press <E>.
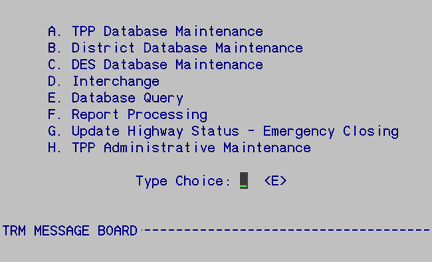
The TRM Main Menu appears:
Figure 3-6. Begin TRM maintenance, queries, and report processing here.
TPP uses the TRM Message Board to provide the districts informational messages about the TRM system.
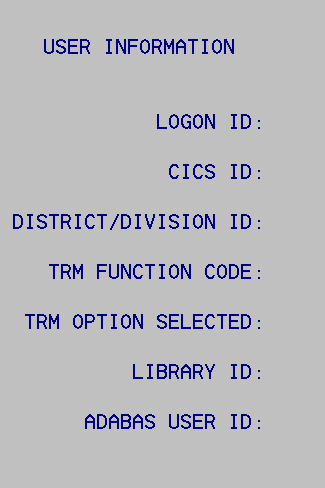
To view your mainframe user information, press <F5>:
Figure 3-7. User information screen.
For further processing instructions, go to one of the following sections in this chapter or to the specific manual chapter you need:
- TRM Update Functions
- TPP Database Maintenance Menu
- District Database Maintenance Menu
- Construction Division Database Maintenance Menu.
Logging Off the Operating System
To exit, or log off, the TRM system, follow these steps:
From any screen within the TRM system, press <F12> (if you get the message “Screen data will be lost! Press PF12 to continue or PF11 to cancel”, re-press <F12> to log off). You exit TRM and the Teleprocessing Applications screen appears:
Figure 3-8. Terminate to exit NATURAL environment.
From the Teleprocessing Applications screen, press <F1>. The screen clears and the system displays a message indicating that you have successfully exited the NATURAL environment:
Figure 3-9. NATURAL termination successful.
Although you have exited the NATURAL environment, you must still exit the CICS mainframe session. Input ‘CESF LOGOFF’ and press <E>:
Figure 3-10. Press <E> to log off CICS.
The system returns to the initial mainframe screen.
