Section 3: TRM Update Functions
Anchor: #i1018651Which Update-Code to Use?
The TRM system uses the Update-Code to determine the transaction’s Update Functions:
- Add function allows the system to add data attributes to TRM which do not exist in TRM
- Update function allows the system to change data attribute values currently TRM to new values
- Delete function allows the system to remove data attribute values currently TRM.
Functions per Data Classification
Each data class, described in Chapter 2, Section 2, uses different update functions:
|
Class |
Description |
|---|---|
|
Point Data |
Uses any of the update functions: Add, Update, or Delete EXAMPLE: Add, update, or delete an on-system intersection |
|
Continuous Length Data |
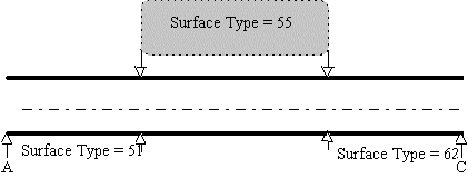
Uses the Update function only. (Compare the Update function for continuous length data to painting a wall. Painting the wall from one point to another completely covers any other pre-existing colors or adds color for the first time to a bare wall.) EXAMPLE: In Figure 3‑16 and Figure 3‑17 below, a route segment contains no Surface Type value. Add a value by “painting” the segment with values using the Update function |
|
Non-Continuous Length Data |
Uses any of the three update functions: Add, Update, or Delete EXAMPLE: In Figure 3-18 and Figure 3-19 below, other values already exist. “Paint” over unwanted values with new values using the Update function |
|
Easy-to-Remember Point Data and Length Data Difference |
|
Figure 3-17. Route with no Surface Type value.
Figure 3-18. Route with Surface Type 55 input between locations X and Y.
Figure 3-19. Surface Types 51 and 62 exist on route; input Surface Type 55 to change a segment within Types 51 and 62.
Figure 3-20. Route with Surface Type 55 input between locations X and Y.
Anchor: #i1018728TRM Update-Code
The Update-Code is a three-character field that dictates screen movement and system processing:
- First Character identifies the Input Data:
-
Anchor: #i1012340Update-Code First Character Value
Description
1
Length Data (TPP and District)
2
Point Data (TPP and District)
3
Highway Network Data (TPP only)
4
HPMS Data (TPP only)
5
Marker Coordinate (TPP only)
- Second Character identifies the Update Function:
-
Anchor: #i1012362Update-Code Second Character Value
Description
1
Delete
2
Add
3
Update
- Third Character identifies the Object of the Update Function:
-
Anchor: #i1012378Update-Code Third Character Value
Description
A
Routes
B
Contiguous route sections
C
Non-contiguous route sections
D
Fillers for roadway gaps
E
Marker Coordinates
F
Off-System transfers
G
Markers
H
Attributes
I
Linking route segments
J
Roadbeds
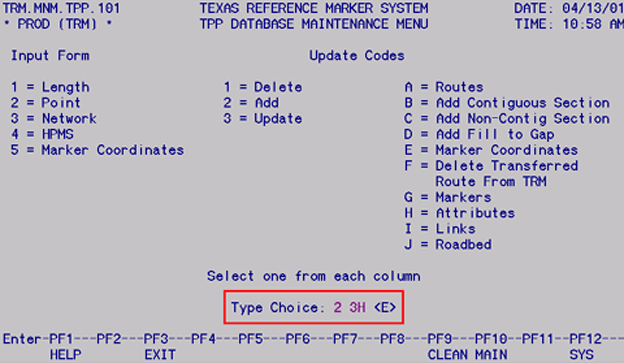
Combine these characters to create the Update-Code. In Figure 3‑21, Update-Code 23H tells the system to Update Point Attributes:
Figure 3-21. TPP Database Maintenance Menu selection.
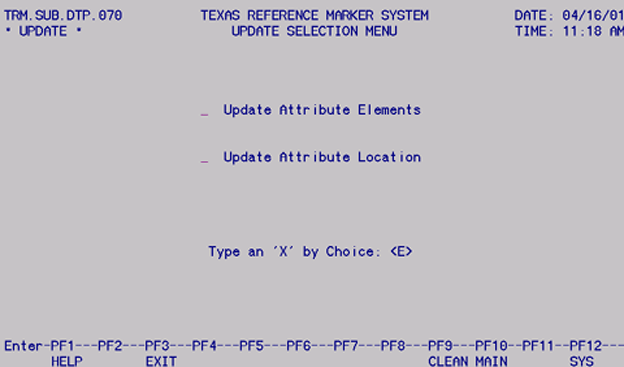
Input Update-Code in the Type Choice field and press <E>. The appropriate submenu or data screen appears:
Figure 3-22. The Update Selection Menu appears after entering Update-Code 23H.


